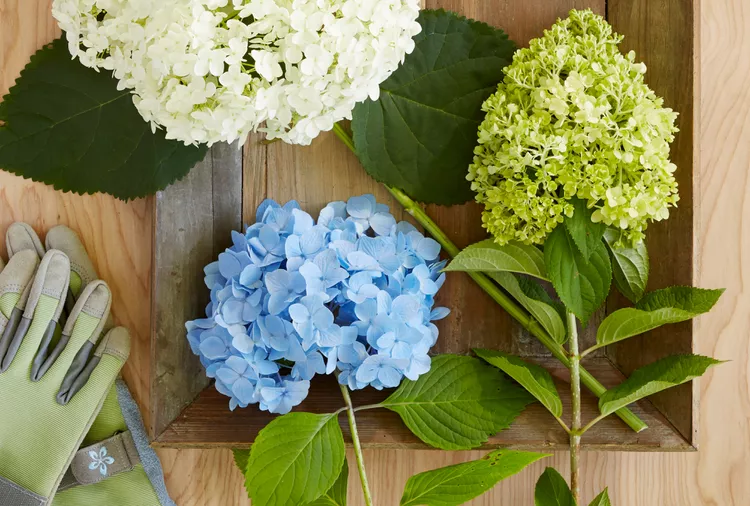
Hydrangeas boast big, beautiful flowers that last for months. You can multiply your collection of these hardworking plants by learning how to propagate hydrangeas. These shrubs root readily from stem cuttings, ground layering, or division. This guide will help you choose the right propagation method for you and your types of hydrangea, and make more of these all-star shrubs.
Select a Hydrangea to Propagate
The best hydrangea to propagate is a vigorous, healthy plant. It should be free of pests and diseases. A new plant created from cuttings, layers, or division will have the same characteristics as the parent plant so choose a plant to propagate that has a pleasing growth habit and flower form.
Some hydrangea cultivars are patented. A patented cultivar is protected, and it is illegal to reproduce a patented cultivar by any method. Popular varieties such as ‘Limelight’, ‘Strawberry Sundae’, and ‘Bobo’ are all protected by patents.
Methods for Propagating Hydrangeas
The three main methods for making more hydrangeas are stem cutting, ground layering, and division. Let’s break them down to find which one is the best for you.
1. Stem Cutting
When propagating by stem cuttings, a section of an actively growing stem is cut from the plant in spring or early summer and planted in moist potting soil. In a few weeks, the cutting develops roots, and a new plant grows. Maintaining consistent warmth and humidity around the cutting until it produces new roots is important. Stem cuttings are usually the most prolific method of propagation. One parent plant can provide many stem cuttings.
2. Ground Layering
This easy method is similar to stem cuttings, but the stems are still attached to the main plant to propagate it. You just bend a stem from the parent plant down to the ground, and bury a portion of the stem in a shallow trench. Roots form on the buried portion of the stem, and then the stem can be separated from the parent plant. The amount of space near the parent plant limits ground layering propagation. This simple method is useful when making only a couple of new plants.
3. Division
Smooth hydrangea (Hydrangea arborescens) and oakleaf hydrangea shrubs spread to form colonies instead of growing clumps like many other hydrangeas. Divide smooth and oakleaf hydrangea colonies by using a sharp spade to dig up a portion of the colony and replant it in a new location. Division is the fastest propagation method for smooth and oakleaf hydrangeas.
Propagating Hydrangeas from Stem Cuttings
Mid-spring or early summer is the best time to take hydrangea cuttings. Hydrangea plants are actively growing during this period and are quick to produce new roots. Take cuttings from a healthy hydrangea that is free from pests and disease.
Step 1: Using sharp, sanitized pruners, snip a 5- to 6-inch-long cutting from the tip of a branch that ideally did not flower last year.
Step 2: Remove the two lowest leaves from the cutting. This exposes the leaf nodes, from which new roots will emerge.
Step 3: Cut the remaining leaves on the cutting down to half their size. Reducing the leaf size lessens the pressure on the plant to support the leafy growth. Instead, the plant can push resources toward forming new roots.
Step 4: Dip the cut end of the stem cutting into rooting hormone. Although rooting hormone is not essential, it speeds up the rooting process. Plant the cutting in damp potting soil, burying the two lowest leaf nodes.
Step 5: Water the pot well and allow it to drain thoroughly. Then, cover it with clear plastic, such as a plastic bag. Add stakes if needed to prevent the plastic from touching the cutting. Place the cutting in an indirect light location indoors—not in direct sunlight. Do not water again unless the top of the soil is dry.
Expect roots to form in two to three weeks. If there is resistance when you gently tug on the plant, it has produced new roots. Remove the plastic cover and allow the plant to continue expanding its new root system. Repot as needed, planting the new hydrangea in a larger container or transplanting it into the landscape.
Propagating Hydrangeas by Ground Layering
All hydrangeas can be propagated by ground layering. Plants with long, flexible stems are easiest to ground layer. Spring or early summer is the best time to propagate using this method.
Step 1: Select a long, flexible stem on the outer edge of a healthy, actively growing hydrangea.
Step 2: Gently bend the branch toward the ground so that a 5- to 6-inch-long portion of the branch near the center of the length touches the ground. Remove the leaves in this 5- to 6-inch-long section. Removing the leaves exposes the leaf nodes. New roots will form at the leaf nodes.
Step 3: Use a sharp knife to gently scrape a thin layer of bark off the underside of the branch where the leaves were removed. Be careful not to disturb the leaf nodes.
Step 4: Dig a 2-inch-deep trench about 6 inches long. Place the prepared portion of the hydrangea stem in the trench and cover it with soil. Place a heavy stone or brick on top of the buried branch to keep it in place.
Step 5: Keep the buried portion damp and disturb it as little as possible. Two to three weeks after burying the branch, check for new roots. Remove the stone or brick and gently move away soil in the trench. If you don’t see new roots, gently tug on the branch. If it offers resistance, new roots have formed. Clip the rooted stem from the parent plant and pot the rooted portion in a container or in the garden. Water gently and regularly until a robust new root system forms.
You can also wait until foliage emerges from the soil, indicating new roots have formed. Clip the rooted plant from the parent plant and pot the new hydrangea in a container or the garden.
Propagating Hydrangeas by Division
Many plants can be propagated by division, although chopping up healthy plants can seem scary to new gardeners. Don’t worry; division won’t harm the parent hydrangea.
Step 1: Use a sharp spade to cut a 6-inch or larger section from the edge of an established hydrangea. Press the spade straight down, digging deep enough to get as much of the root system as possible. Each section needs both leaves and roots to grow.
Step 2: Replant the new section promptly so the roots don’t dry out. Plant it at the same depth it was before in similar light and soil conditions.
Step 3: Water the division and cover the surrounding soil with mulch to conserve moisture until the plant becomes established.